Showing posts with label Bike Gear. Show all posts

Wednesday, May 19, 2010

Bike is back in gear..

As you may have noticed, I lost my dérailleur hanger during the hammerhead 100 ride.  That was a day I would like to forget, to be honest.  Im over it now, but it was very disappointing.  Im not sure if I mentioned it before, but the Small Block 8 tires really dont work well for out at Nayls at the higher speeds that I am trying to ride at.  Some of it may be my bike handling skills, and some of it is the fact that these tires just dont seem to hook up well in highspeed corners.

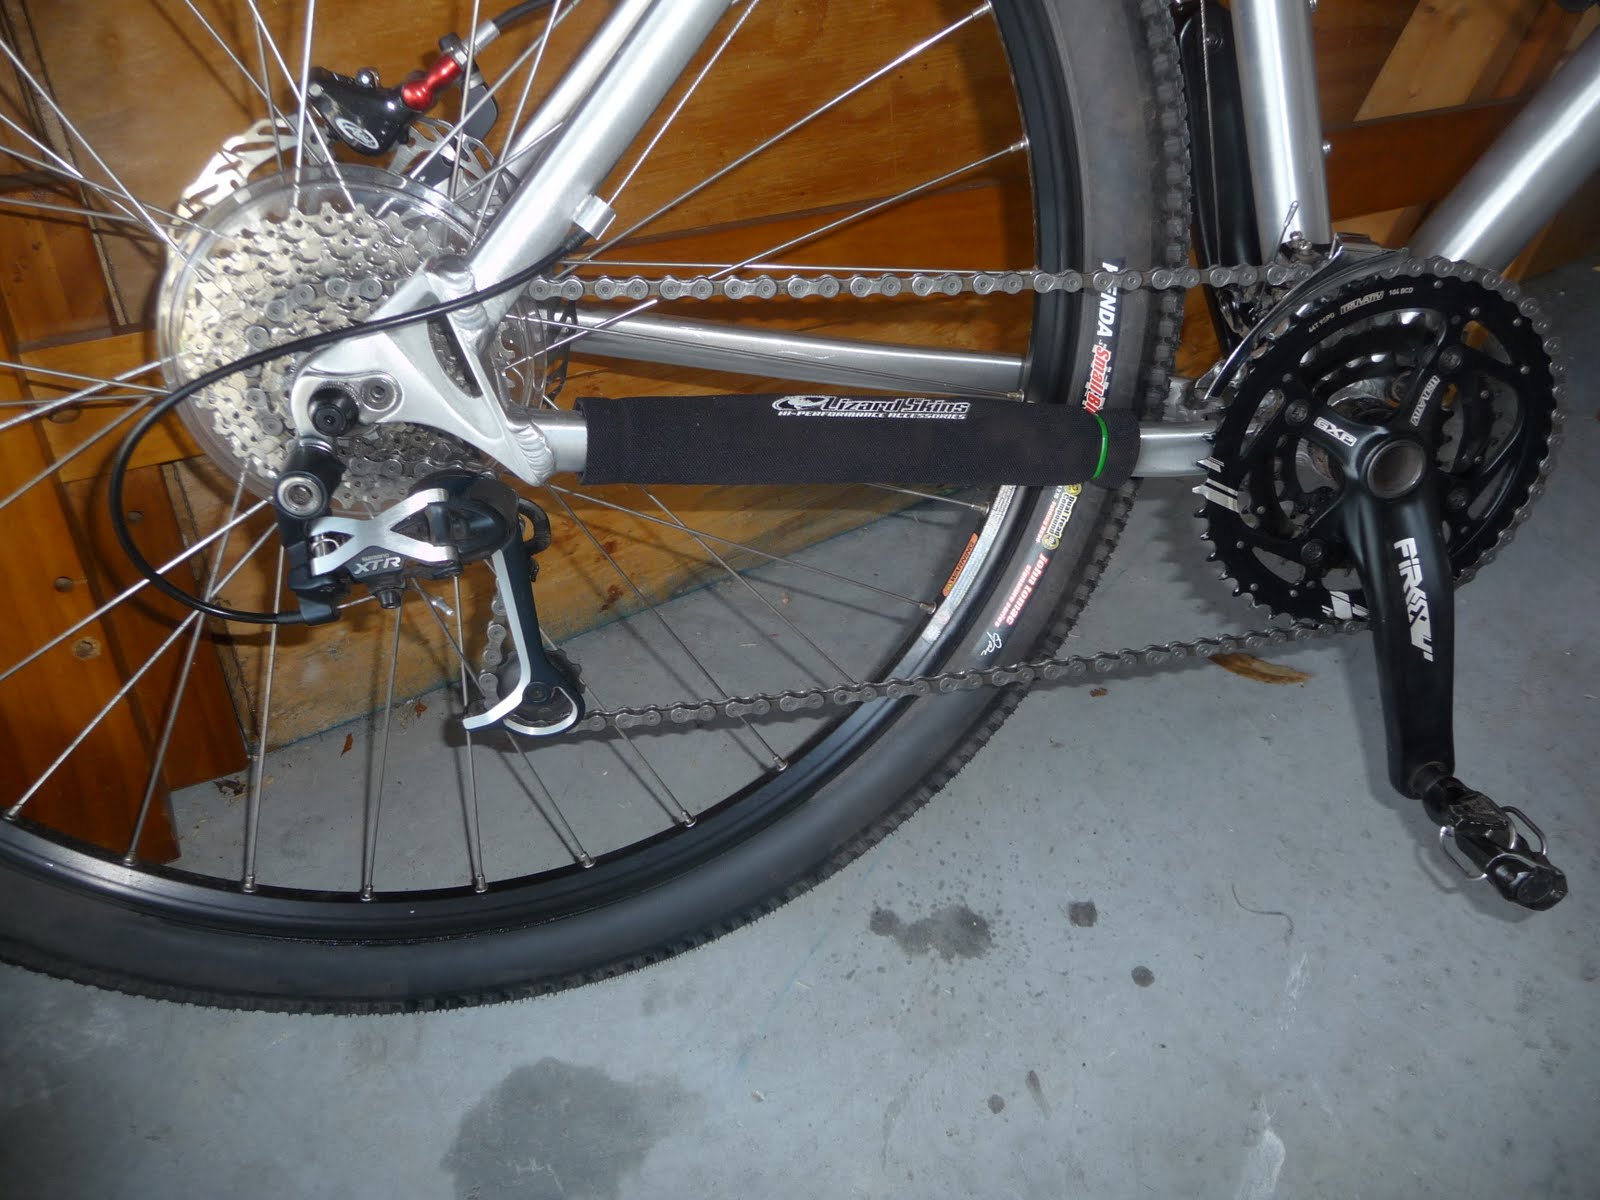
During the race, I found myself off the trail twice because it seemed the tires just weren't hooking up.  Around mile 20 a stick hopped up and got caught in my dérailleur.  I stopped, pulled the stick out, and continued on my way.  I noticed immediately that the chain was hopping a little.  I stopped again, checked the drivetrain and saw that the hanger was bent, and the dérailleur was pretty much jammed onto the hanger.  Ugh.  I tried by hand to bend the hanger back, but it snapped. Double Ugh.  Unfortunately, I didn't have a master link or a spare hanger.  Even if I did have a hanger - I couldn't get the dérailleur unstuck from the hanger.  I broke the chain and used one of the pins to try to make the bike a singlespeed.  It didnt work.  I walked back to the staging area and happened to get my pic taken a moment later.


Anyway, I got a new hanger, used a vice and got the dérailleur off the old, and put it on the new.  I got a new sram 991 chain with a 'PowerLink'.  (basically, its a masterlink - so I wont  have issues with a broken chain and having to walk to the car).  I also purchased some new road bike shoes.  They are on the way.  In the mean time, I used the mtb for commuting a few times after sticking some slicks on it and getting it back into riding shape.  The last 2 weeks since the race, I have gotten very little riding in, in fact - I have only ridden about 60 miles since the race. Mostly because I was waiting on the hanger.  Thats going to change very shortly though - now that the bike is back in order. Ill put the small blocks back on the bike until I eventually pick up some new tires, and head out to santos this weekend.  Yahoo!  The 8 hours of labor is coming up, and I would like to participate in the solo class.  Call me crazy, but Im really liking this endurance riding thing - even though I bonked in my first race, and broke the bike in the last race.. haha. try try try!

Monday, April 12, 2010

Easton Monkeylite bars and EC70 Zero Seatpost

I recieved and installed my new parts on saturday.  The Easton Monkeylite bars and seatpost are beautiful.  The handlebars are ludicrously light while being wider than the Ritchey riser bars.


This picture shows the Ritchey Comp bars up top and the Monkeylite bars down below. There is also a slight backwards sweep in these bars - moreso than in the Ritchey bars.

The seatpost uses a really simple two screw clamp that is similar to the Thompson's clamp.  You dont have to remove the screws all the way in order to put the saddle on.  This is a really nice feature.


Sorry for the craptastic photos - but I had to take them with my phone.  It only took a few  moments to put the saddle onto the seatpost, then install it into the frame. The handlebar took a few minutes to remove the old, then put the new one on. 


I put the Edge on the stem, and clamped everything together just hand tight. I also threw on the Salsa skewers to replace the garbage that came with the bike.


These Salsa skewers are so nice.  The springs arent as flimsy as the old skewers and the lever itself is shaped nicely so that it bends inwards to keep from getting snagged on brush.  And - they are red. Ahh. Red.

I took the bike out for a ride at the e-center to see how it handled after losing almost a pound of flab.  I really liked the wider and more swept back handlebars.  I felt I had more control of the bike, while not being so wide that I couldnt fit through any narrow passages.  I found myself going a little bit faster than normal.  Unfortunately, the seatpost slipped about an inch and in the process scratched nicely.  Thats probably my fault for being afraid of over-tightening.  I tightened it up some more and it didnt slip the rest of the day.

Unfortunately, there is a pretty nice sized scratch in the surface of the seatpost right at the clamping area.  Im sure its not a big deal, but Im not going to risk it on a mountain bike. I can imagine sitting down hard after a bumpy section and the thing snaps, sending my balls into a sharp carbon dagger. Therefore, I have relegated this seatpost to the roadbike.  My road bike had a generic piece of crap seatpost on it since the standard GIANT branded carbon post got stolen.  Long story.  I will think long and hard about having a carbon seatpost on an MTB before spending the money again. If I do get another one of these posts I will use some of that carbon goo that supposedly helps keep carbon from slipping.   To be honest, the Easton seatpost is beautiful, and worth the money on the clamp alone. It looks really really nice on the bike, and helps with the fit a little because of the zero setback design.  However, I think it will be more at home on the road bike - where the scratched/gouged bit is not right at the clamping area.

Monday, March 29, 2010

Daddy's got a new pair of Shimano M182 Shoes

I have grown pretty weary of wearing my old shimano touring style mountain bike shoes.  The sole is flexy, they dont offer a heck of alot of grip when having to hike-a-bike, have laces (albeit with a velcro strap that secures them), are seriously heavy.  They have, however, lasted 9 years and are still in quite good shape. The label is worn off, so I dont remember what model it is.  I bought them when I got my first 'real' mountain bike back in 2000 that came equipped with Time Atac pedals.

Research is my friend.  I research everything I purchase for what seems like weeks before actually spending money.  Since I have had great luck with my existing shimano shoes - I wanted to get another pair.  The pair that I was particularly interested in was the M086.

These have everything I want in a shoe.  A stiff fiberglass reinforced  sole, a secure ratcheting system, and a price tag that is not astronomical.  $109.00 at the LBS, but can be found for 90 bucks online.

I went into Orange Cycle Orlando to try these puppies on for size before probably ordering them online.  I tried them on in a size 45 and they fit perfectly. The price was exactly as I thought: 109.00.  I wanted to wear them for a few moments - they were nice and stiff, the ratchet worked great.  In my test driving them out for size I noticed the 'clearance' rack.  Looking through the shoes there were some Lake models, some lower level Shimanos : all in weird sizes, along with one lonely box labeled SH-M182 in size 45. I had read about these: Carbon midsole at a decent price of around 180 bucks.  They are last year's model and were labeled 109.  Bargain!  I had to try them out.  These shoes fit exactly like the other models did: very well.  One difference was the stiffness.  Wow - these puppies were not flexing at all.  Really nice and stiff.


So, these are basically the same shoe 86, but these have replaceable toe-spike and a carbon midsole.  Check out how sexy they are.  (if you can call shoes sexy). Needless to say, I bought them.  Yay me.

I tested them out on Saturday out at santos riding Nayls trail.  I post about my ride tomorrow or the next day.

Thursday, March 11, 2010

Garmin Edge 500

The Garmin Edge 500 is a new GPS based cycle computer.  As you may have read, I purchased the Edge from Bike Bling to ride with at the Tour de Cure, however, I didnt get it in time.  Garmin makes several pure cycle computers: the Edge 205, Edge 305, Edge 605, the Edge 705 and the new Edge 500.


My previous computer was an Edge 305 that I absolutely loved. That is, until the battery connectors became a problem.  This was a fundamental problem with that model (and possibly with the 705 as well).  One side had the battery and connector, the other side had the pcboard and little springs that pressed against the battery connector to give the unit power.  What happens is: The springs get worn after a period of time and the unit begins to shut down unexpectedly if you hit a bump.  It began to get progressively worse until I had to take it apart and try and fix it.  The fix worked for several months - but it was just too annoying to go on.

The Garmin Edge 500 comes with either just the unit or the unit with cadence/speed and HR for a hundred bucks more.  Previous cadence/speed and HR sensors work with this version.  So - My old 305 sensors were detected immediately.  The head unit is a very attractive blue/silver.  It is much much smaller than the 305 and even smaller than the 705. In the box you get the usual CD and handful of little books, a little packet full of black 'rubber bands' and two mounting plates, a USB cable, and a multi-function wall charger.  The wall charger comes with a euro and american plug attachment. I didn't get the more expensive model with the sensors, so that is all that came in the box.

Why are there rubber bands in the box?  Well - this is how the unit mounts to the bars.  It sounds weird, but it is an awesome method of attachment.  The mounting plates have four protrusions that allow you to wrap the rubber bands from one side to the other - securing it to the bar very tightly.  There are multiple sizes of bands for thicker handlebars, stems, etc.  This is so much nicer than zip-ties, because you can just take off the rubber bands if you want to move the mount.  The unit itself is put into the mount and turned 45 degrees to lock it into place. I think it will be very difficult to oops the unit off the mount and onto the road or trail. (as I did a couple of times with my edge 305)  Since it comes with 2 plates and a ton of rubber bands you can easily set this up to go with two bikes - in minutes. You can also get the wristband for the 310xt and attach this unit to your wrist.  That would be a heck of a weird watch - but its a cool option.

The screen is a simple black/grey screen with backlight.  There are two buttons on each side that have multiple functions.  Menu/page/enter, Power/back, Start/Stop, and Lap/reset.  I cant say it again, but this thing is tiny if you are used to the bigger garmins, but it is fairly big if you are used to the svelte little cateyes. The unit only weighs 2 ounces. 

Anyway, you get an absolute ton for the money. I am not going to go into a super in depth review - there are quite a few out there,  Check out DC Rainmaker's Garmin Edge 500 review .  He goes into far more detail than I want to go into with this review. One thing, I think he does not mention is the newer firmware version 2.20 that includes 'workouts'.  This allows you to setup a prefab workout routine such as heart-rate based intervals, speed intervals, time intervals, power intervals, etc. I do not think, however, it includes the virtual partner. Im a little bummed about that, since the virtual partner is a great motivating tool.  If you are in the market for a cyclocomputer - this is one that demands serious consideration.

Friday, February 26, 2010

Super Annoyance with "Bike Bling"

**Update**
Bike Bling has refunded me 10 bucks for shipping.  Much kudos to Kerry.


I haven't been writing very much lately, and I am sorry about that.  Road riding has been taking a lot of my time, along with birthdays, travel arrangements, valentine's day, etc. 

I have been riding on the road alot lately, as well as spending time on the stationary - since I hate riding at night on the road bike.  I ordered some new tires for the bike:  Michelin krylion carbon tires.  My old ones were looking pretty bad.  Accidentally I got the 700x20mm tires. Whoa, these puppies are thin and were an absolute bitch to put on.  I am amazed the tubes didn't end up with a thousand pinches.

The 'Annoyance' in the title of this post refers to an order I placed with BikeBling on the 23rd.  I purchased a Garmin Edge 500 for 219 (review when I get the thing).  This is a great price.  I have the HRM strap and cadence/speed sensor already from my old Edge 305.  So I pay for the thing and pay 11 bucks for 3 day shipping on the 23rd thinking I should get it by friday.  I get an email back the same day asking if I want it by friday or monday.  I tell him I want it by friday.  Another email later saying that it will cost another 6 bucks but he will ship it the 24th using 2-day, and I will get it Friday.  I think 'great!' 

On the 24th I check my order status and it still says that it is processing.  I check my bank statement and I get charged 6 bucks extra for shipping. Im a little nervous, but you know how these things are - sometimes they ship out and the status doesnt get updated right away.  I get an email the next day - the 25th that it has shipped. I check the email - and it JUST shipped on Thursday 2nd day - to be arriving on Monday.  Great - ordered tuesday, shipped thursday.  I will get it on MONDAY (after my Tour de Cure ride is long over) Get this.  I pay extra money shipping so I could specifically get the item before my ride.  This irks me to no end.

Sometimes it pays to just buy from someone you trust from the internet. I.e: Amazon.

Monday, February 1, 2010

Endura Humvee 3/4 shorts and a muddy ride.

Last week I pulled the trigger on some Endura Humvee 3/4 shorts (knickers ?)  These are the 'shorts' that go all the way down to your calf.  I wanted something that would cover my knees and assist with keeping them warm, as well as something that I could wear on casual rides without looking like a spandex warrior.

These are lightweight shorts that come with an internal snap in liner short made entirely in Great Brittain. The liner short is a pretty nice spandex short with a full chamois.

 
They have 4 points where there are 3 little snappy-do's that hook to your outside short.


The material for the interior short is just like any other lycra cycling short you have worn, really.  The exterior short is made of a lightweight ripstop fabric and seems to be double and triple stiched everywhere.  There are articulated knees, meshy fabric behind the knee/calf, and little velcro tabs that let you tighten the cuffs to fit nicely around your calves.


There are a bunch of pockets.  There are two back pockets with velcro tabs that are very low on the butt to keep from interfering with the saddle.  This seems to work really well.  I rode with my wallet in one of the pockets and it didnt bug me at all.  Theres a little 'cell phone' pocket with a velcro tab closure, a couple of zippered front pockets and a 'cargo' pocket that you could maybe fit a couple of clif bars in.  Theres also 2 zippered vent pockets and a keyring.

Cellphone Pocket
Key clip

I rode these for about 3.5 hours in a pouring rain on saturday.  They are extremely comfortable.   The inner short is very nice and feels just like a good pair of cross country/road bike lycra shorts (it even has a little endura logo, in case you want to ride with just the inner short).  The pad is substantial, and quite comfortable.  Im thinking that someone who is not used to riding with a chamois would think it is weird, especially since this pad is quite thick.  The articulated knees worked well along with the cuff closures to keep the calves from ballooning out and becoming weird.  

All in all, my ride in Santos was a fairly miserable one.  It was just barely raining for the first hour.  The skies opened and began dumping buckets after that.  I was riding through a good 6 inches of mud and water for most of the way.  

Check out those nasty shorts.  Totally and absolutely soaked, muddy, and pure disgusting.  Hey, they washed up okay.  All of the clean pics from above are from after the ride, and a wash.  I washed them in the washing machine, but would recommend against that.  I noticed some threads loosening already.. (after one wash!)  So - wash them by hand.  I would highly recommend these shorts.  They are comfortable and relatively cheap by comparison.  They can be yours for the low low price of 89.00 from amazon.

Oh and - support me for the Tour de Cure.  Im only riding the 60 mile course, but I need to raise 150 bucks in less than 3 weeks.. Donate!

Sponsor me in the Tour de Cure

Monday, January 18, 2010

Specialized Deflect Gloves - Report

As luck would have it, after purchasing my 'Winter' Gloves - the weather started to get warm again.  I was, however, able to ride with the gloves during some pretty cool 45 degree weather on the road, and I also was able to put them through a muddy ride in 70 degree weather.

The gloves fit me very well, are comfortable, and look great. They have a little snap on the gloves that allow you to button them together to keep them in a pair.  This is a feature I will never use, but some may be more organized than me. They are sort of difficult to put on, since they have a stretchy cuff without a Velcro closure. There was a worry that the padding on the palm was not going to be substantial enough to keep my hands from going numb on sustained rooty and rocky terrain.  Unfortunately I was right: these gloves do not protect from vibrations as well as my Pearl Izumi gel gloves.  They do not seem to relieve the pressure on the ulnar nerve in the palm/wrist area as well.  I found my hands going numb for the first time since I put the Ergon grips on the bike, causing me to have to shake my hands, or change position a few times while going through particularly rough, rooty, or technical sections. 

That being said - they kept my hands warm during the day that the weather dropped below 45.  I would highly recommend not wearing these gloves above 70.  My hands felt sweaty and downright hot when I wore them over the weekend that I thought was going to be cool, and I didn't have any other gloves. So - I probably spent 35 bucks on gloves that I will wear only once this season, if it doesn't get cold again.

Would I recommend these gloves? Not to someone who has issues their hands going numb due to vibration.  Sure, some of the issue may be with me gripping the bar too tightly when hitting technical sections - but - numbness really isn't an issue with the Pearl gels.  If you don't get numb hands, live somewhere where its cool more than one weekend a year, and need a pair of sporty looking gloves that are well made - buy these.

Saturday, December 12, 2009

Worst.Lube.Ever.

I went out for a three hour ride today out at Little Big Econ.  Was going to hit Santos - but I have a concert to go to tonight, and tomorrow there is a race out there. There is always next weekend.

I cleaned my drivetrain today before going out for a ride.  Unfortunately, I was out of my White Lightning Lube.


I always use that stuff on my chain, and I use 'Finish Line WET Lube' on pivot points on the dérailleurs and on the exposed cables. White Lightning works great. Bummer! Ive never tried the Finish Line on my chain - but it does say 'for Extreme Conditions'!


Oh, marketing.

Within 2 minutes of riding in the dirt my chain was grinding whenever I put any power to the drivetrain.  I thought there was something stuck in the dérailleur.  Wrong.  The chain was COATED in dirt and leaves.  The rear pulleys were covered with gobs and gobs of goey dirt/mud.  I couldnt believe it!  With white lighting - nothing.. I mean nothing, sticks to the chain. I dunked the friggin drivetrain in mud last week and within 2 minutes it was clean and grind free.  Now - for an entire 3 hours my drivetrain sounded like an old lady chattering her false teeth.  Whatever you do: Stay away from Finish Line Wet Lubricant if you are going to ride anywhere NEAR dirt. For extreme conditions indeed.

Lesson:  Make sure to have the right lube for your chain before cleaning it.

Monday, November 30, 2009

Suffering with a smile..

Yesterday was the first time I got out on the bike, or rather any bike other than the motorcycle, in a week. The whole Thanksgiving, family, and a bit of rain got in the way. I also did some work on the motorcycle and on the car - cleaning both of their K&N air filters, and re-oiling them.  I had to put the SV on the battery tender for a couple of hours to get it started - then went for a nice ride on saturday for a couple of hours.


Oil, oil filter, and spark plugs need to be changed next weekend.. I do all of my own maintenance and I hadnt ridden the motorcycle for about a month. Mainly I havent been riding it much because I need to check and possibly adjust the valves - Im about 6K miles over the suggested check mileage. (Im at about 20k miles on a 2006 SV650) I do know, however, that I probably wont have to adjust them till 30k miles. But - I also know it will be a pain in the ass. For a while I was riding it almost every day to work, and on the weekends for fun.

Anyway, back to the bicycle...On previous rides the squishiness of the Reba front shock was very apparent. It was obviously under pressurized.  So, before going for a ride on Sunday I picked up a shock pump from Orange Cycle Orlando. It is a 'Buzzys Pollinator' Pump. Yes. That is what its called:  Buzzy's Pollinator.


To be honest, I dont care what it is called, as long as it works.  And this works, and was around 30 bucks.  According to recommendations the pressure I should run is 130 positive and negative.  So, I got to pumping the shock up.  It was very easy.  On the Reba, the positive chamber is located on top, and the negative is on bottom.  As shown in the pics below:


These photos are kinda dark, but you get the picture.  The air chambers are on the left side of the fork.  When I screwed the pump in, it was reading a very low 80lbs pressure.  No wonder I bottomed out a few times.

Sunday, I went for a 2.5 hour ride and covered about 20 miles out on the Snowhill trails.  I averaged almost 9 miles an hour - which includes about a 5 minute rest stop.  Thats not bad for Snowhill and its switchback laden trails.  Thats about a mile an hour faster than any previous ride out there, and I didnt fall off the bike. The shock made a difference, for sure, but it may have also had to do with the fact that it rained alot last week and the sand was packed down.  The shock was not squishy at all, it soaked up bumps but didnt bottom out and jolt me.  Much more plush than the 'wet-noodle' feeling that I had before, and I didnt have to struggle through gobs of powdery sand. I really pushed myself through alot of this ride.. I had a group of guys that looked like they were pretty experienced mtb riders on my tail for a bit of the ride - and I managed to keep them out of sight and behind me until I took a different trail than they did.  I could hear them yelling at the blind corners.  Thats a pretty good idea out there - considering I almost had a head-on collision with somebody when I was coming around a blind corner.  Off work again today, and may get out for a ride...

Sunday, November 22, 2009

One of these things is not like the other..


Dirty drivetrain immediately after a ride.


Clean drivetrain after a thorough washing.

In my infinite wisdom, and lack of shame: I share with you a photo that I took looking down at my legs moments after a dirty bike ride. From that angle - don't they look a whole like turkey legs? Hold on, let me add more trimmings.


 mmmm

 
 Yum.

Come on everybody - its an early Thanksgiving treat!

This message has been child approved.


Thursday, November 19, 2009

Big Sandy Wheels and I need a Camelbak.

Yesterday marked the beginning of some vacation time I needed to take.  I only work about 2 days over the next two weeks. To start my vacation out right - I went for a nice bike ride out at snowhill.  To be honest, it was a pretty miserable experience. It has not rained more than a sprinkle in about a month. Needless to say, a very large portion of the trail is sandy.  When I say sandy, I mean it is as sandy as riding through a sugar sand beach.  The entire east side of the trail is tight singletrack - of sand.  This means that trying to whip around these switchbacks at any speed is fruitless. It sucks. period.

Once you get out to the river side and over west, its alot nicer.  There is another entrance Im going to use that skips the east side and just drops you off on the west side.  I got a good workout, and again basically ran out of water.  I got back to the car after about two hours with only sips left.  Endoing and going end over end caused one bottle to lose a bit of water.  I dont even want to go into that, particularly.  Lets put it this way:

Stump + high speed + not managing to get rear wheel high enough = ouch, suddenly dirty and sore.

or :


Lets just say that after that mishap I was pretty miserable, and barely cracked a smile. The trudge through sand on the way back left me grumbling and unpleasant.  Afterwords, I trekked right over and picked up one of these:


It is a Camelbak MULE.  I got the non 'NV' model. The NV is supposedly more breathable - but its a pound heavier. I was going to get a small one, but the Rogue and Lobo just wouldnt carry much stuff in case I want to do a long unsupported ride in the woods.  This has a 100 oz reservoir and quite a bit of expandable storage.

It is absolutely not as huge as they make it look on the website.  You can fit a ton of stuff in it, but when it is not packed with 5 days of crap you can cinch it down pretty tight.  It also has the 'Air Director' which consists of six 'meshy' pads which lift a bit of the bag off your back for airflow.


The reservoir has to be removed to be filled.  This sorta sucks, as it has a quarter length zipper in the back and you have to take the reservoir out, and stuff it back in when you fill it.  Here is the zipper opened all the way:


I guess you dont have to remove the reservoir from the pack.  It may be awkward to fill with it inside. We will see.  The storage is laid out very well.  There is a small 'overflow' pocket and a small zippered pocket with an organizer and key attachment:


I was able to fit my wallet, keys, a tube, a multitool and tire levers in here with room to spare.  There is also a nice felty pocket for your ipod, complete with a little earphone hole on the zipper.


There is a huge main pocket that I could throw a base layer, arm warmers, leg warmers maybe even some shoes in.  It does seem to get squeezed a bit by the full bladder.  Theres a giant overflow pocket that can be opened up by uncinching the buckles. Heres a pic with it uncinched:


You can see how huge that is.  I could easily store enough water and supplies for a full day's outing.  The hose can be run on either side, and it has both sternum and waist straps. You can remove the waist strap altogether with velcro loops on each side. With the waist strap on you cannot reach your jersey pockets, but with it off the side pockets are available to be used for gels and other quick grab food.  The pack seemed to be very stable even with the waist strap off.  I jumped up and down and it barely moved.  I also practically stood on my head, and it wouldnt slide up and bonk my noggin.  Ill give a ride report tomorrow, as I plan on going out for as many loops as I can stand of the west side of Snowhill.

Monday, November 16, 2009

Something Delicious.

I am a big proponent of making sure to keep hydrated and fed during bike rides.  Most of my road rides have always been around 1.5 to 4 or 5 hours. My average mtn bike ride so far has been about 2 hours.  One bottle of water/sports drink and about 600-800 calories consumed per hour is the norm - depending on effort. Im not anal enough to whip out a calculator during a ride to figure out my nutrition, though. For 'liquid food' very little beats the sustained energy levels that Hammer Nutrition's Espresso gel gives me.  Problem is - it tastes alot like salty bongwater after it gets really hot sitting in your jersey and its all you have been eating for the last two hours (Not that I know what salty bongwater tastes like - just so you know). They have a raspberry flavour that I just dont like so much.

For solid food I rely heavily on clif bars (unless I stop and pick up a sandwich or something at a 7-11).  Clif bars are downright tasty and provide great energy.  I have literally eaten a chocolate brownie clif bar for breakfast. They are THAT good. The downside?  They are hard to eat,  dry and dense in your mouth, and hard to swallow after a couple hours in the saddle. I dont feel like playing the 'whistling game' on the bike. You know, when you were a kid and the game is to eat some saltines and try to whistle?  Nothing comes out but crumbs and a whooshing sound. Thats kinda what it feels like, except clif bars are much heavier in texture. I have suffered through this thinking there was no real alternative.

Lo! I have found something that may be the cure for my ills!  Clif shot bloks!  I had heard of them through fatty (fatcyclist.org) but always thought it was a gimmick.


They are no gimmick.  These little beauties are 200 calories per package, and are like eating squishy, delicious gummi bears on the trail.  I tried them out for the first time this weekend and found them to be super easy to eat.  I alternated between a package of clif shot bloks and Hammer gel.  This was an excellent combination.  The flavour I tried was 'cran-razz' - and have since picked up some black cherry with caffeine. 

Supposedly caffeine helps you utilize carbs better when exercising or something.  Im sure next year they will say caffeine will cause brain damage when used in conjunction with exercise.  Oh, science! I will put these babies to the test this weekend - I plan on going up to Santos and putting in some serious saddle time. I am curious to see how I eating these after a couple of hours. I see heavily weighted jersey pockets in my future if I am sans Camelbak.

Friday, November 13, 2009

Handwringing and Hand-pain

Before I get into my purchase of new products let me fill everyone in on my ongoing Motobceane saga.  Since my bike is completely built up and the box basically got destroyed unpacking - packing up for a return is pretty much out of the question.  After mentioning to Mike over at Bikes Direct that I have a Cycle Spectrum locally - and that I could take the bike in there for exchange on a new non-misspelled bike I was offered a 50 dollar 'discount', or the possibility to exchange.

To be honest 50 bucks is pretty paltry for a royal screw-up like the major decal on the bike being misspelled.  I replied wednesday with a response of 'How do we handle the exchange?'  and 'I dont want to wait forever to ride!' I did tell him that 'Its possible that if the discount was 100 dollars, we could just call it even'  I think a hundred bucks is pretty fair, and certainly less than it will cost for them to re-ship a bike and whatever money they may blow getting this frame fixed and re-clearcoated.  Even though the decal thing isnt a big deal, its one of those things that I will look at forever.  Something like this just solidifies the mystique that Motobecane has of being a one-off brand in some people's minds. I dont think that is the case, but perception is reality, yes?  A hundred bucks would at least be enough for me to consider purchasing from them again. If I were Motobecane/Bikesdirect, I would make damn sure I was as happy as hell and as fast as possible.  If this was one of their 300 dollar bikes I would probably just forget it. However, it is their most expensive aluminum 29er.

I have a whole lot of riding to do this weekend, and I have vacation next week and throughout the coming weeks.  There is no way that I am letting this bike just sit in the garage until I hear something back from Bikes Direct - I didnt ride it all week, and I am itching to get it out on the trial.  Am I risking BD from saying the bike is too 'used' to return?  I suppose I may be. The guys over there seem pretty cool so far, but I havent heard anything back yet - and its friday.

Anyhoo - on to the fun stuff.  I purchased a lizardskin chainstay protector, and some ergon GX-1 grips from Orange Cycle Orlando.


Fancy fancy Ergon GX1 grips.  These weigh in at 129 grams. That is the same weight as their GP-1 superlight carbon grips.


Yes, they were about 15 bucks more than I could find online, but sometimes it feels nice to walk into a store, find something you like, and walk out with it that minute.  Rather than browse, click, buy, wait wait wait - its browse, buy, use.

These are smaller grips than the GP1 grips. I have rather small hands and the GP1s were a) more expensive and b)  pretty big.  They had these GX1 grips in hideous team green on display and luckily the black ones were in the back.  They installed in a few moments.  I pulled off the old grips - then had to move the controls in a little to fit the new grips on.  Once I put the new grips on, I adjusted to a comfortable angle and used an allen key to tighten. viola.  The lizardskin seems to be a little big.  It is the 'SUPER JUMBO' model.  They didnt have a non-super-jumbo model to buy.  I would have used an old tube as a protector, but I dont have any old tubes!  Anyway, I will get some pictures this weekend of my purchases and give an in-depth review of both products.

Wednesday, November 11, 2009

To Camelbak or not to Camelbak..

That really is the question. Since it has been years since I have been into mountain biking I had forgotten what its like to have to stop to drink only to stick a sandy bottle into your mouth. Oh, the joys of crunching sand in your teeth never get old, but I am wondering if there is a better way? I used to have a camelbak that I would use on every ride. This seemed like the perfect solution since it is really hot here in Florida most of the time and I tend to sweat. The problem is, I have gotten very used to not having a backpack on when riding. Something about having a hot backpack on my back while trying to navigate tight switchbacks, or navigate up a steep incline, does not seem very inviting. Then again, neither does running out of water after an hour and a half. I drink - tons - of liquid. I am not exagerating when I say that I drink at least a 24oz bottle every 45 minutes or so.

When I do 3 or 4 hour rides in the summer on the road I carry two bottles on the bike and one in a jersey pocket. Oftentimes I will stop and get more water to make sure I don't run out. It may be paranoia caused by the very awful feeling of running out of water that causes me to carry so much liquid. Not long ago I was in the middle of nowhere with no water sources within 45 minutes in a particularly baking and treeless portion of western central florida when I realized I had no water left. Im not sure if either of my two dear readers have ever experienced the cold chill, exhaustion, and desire to lay down at the side of the road that comes from dehydration in 100 degree weather. If you haven't - don't. That day, thankfully, I found a house and borrowed their hose to fill my bottles.

So - all of this begs the question - why not a camelbak? I was looking at the Camelbak Lobo model:


Probably wont get it in eye-searing orange, though. Still.. I don't think I like the idea of wearing a backpack. The pros seem to outweigh the cons, though: No sandy teeth.. No running out of water.. no need for a seat-pouch.. I can drink water while moving.. Could I fill this thing with Accelerade? Should I fill this thing with accelerade? I love the caffeinated goodness of Accelerade but I like having water AND sports drink with me. Would 100 oz of water and 24oz of sports drink be a little ridiculous? They do have smaller Camelbak models. Maybe I should look into a tiny little 50oz model for water, then carry my 24oz bottle for when I take quick breaks. I don't know about you, but I find it very difficult to navigate through singletrack and pull a waterbottle out of its cage at the same time. I will ponder this a while.

Friday, November 6, 2009

Time ATAC Alium Pedals

I got my pedals today from UPS. I love goodie boxes.

Box:


Installing pedals is not very tricky. One thing you have to remember is that the 'righty tighty' rule does not really apply except for on the right side of the bike. Here is how it works:

Standing on the right side of the bike, you tighten the pedal by turning right, and loosen by turning left.

Standing on the left side of the bike, you tighten the pedal by turning left, and loosen by turning right.

Pretty simple. So I took my pedal wrench (15mm) and snatched off the left pedal. (By turning right) Here is a picture after taking the pedal off. May be a confusing picture considering the other bike right behind this one. hah.


Viola - Pedal is gone. Now, take the left hand pedal and coat it with grease. You will know this is the left hand pedal because the threads slope up to the left.


Check out the threads. So I just used my fingers to tighten the pedals on all the way. You dont really need to use a tool to tighten pedals since the pedaling action itself will tighten them. Thats why the threads are the way they are.


Yay.. real pedals! Now, obviously you have to install the cleats. The cleats are brass and are also labeled with an arrow for the 'front' of the cleat and a L or R. Obviously, stick the R on the right foot, and L on the left. Easy as pie.


These screw to the metal plate on the inside of your shoe. You need to reach inside the shoe and hold the plate in place. Unless, of course, your shoes are old like mine and are basically stuck in place. After attaching the cleat to the plate you can move it up or down to change where your foot sits on the pedal. It may take some trial and error to feel best, or what makes your knees happiest.


These pedals are really awesome. I used them many years ago, and they are as I remember: very easy to clip in and out of, but hold nicely. They provide a bit of a platform, so you dont feel like pedaling on ice. I tried eggbeaters and just couldnt deal with the weird disconnected floaty feeling I got. After a short ride around the neighborhood I can tell you, this bike is very smooth. One thing I do need to do though is add more air to the shock. Tomorrow is the first test on dirt. To be sure, I will fall over because I cant unclip from the pedals at one point or another.

Thursday, November 5, 2009

It has arrived

So, the bike came in. One day early. Bonus! It came in a big box that seemed to be completely undamaged on the trip over. Another bonus!

Behold:


And looking inside it looks like a bunch of bike parts.. in a box!


Since I don't have a bicycle work rack, and since the garage is hot, where is the next best place to build a bicycle? Of course: The front room, with a host of ugly chairs as an audience.


You will notice, I have removed top-cap and cardboard spacer from the headset to install the stem. Also - the shifters and rear brake lever are in a little bag dangling next to the fork. The handlebar is on the left in a little bag. The poploc, grips, front rotor, pedals, reflectors, and screws and such are in the box there. I don't have any pictures, but I installed the stem and handlebar. Then, i slid the shifters, poploc, and bake levers onto the handlebar - all very loosely.The rear and front tires have protective plastic shields over the hub area shown below:


Also notice.. The Elixer CR brakes. *swoon*. If you dont know, these brakes what you would refer to as 'fancy'. The front wheel did not come with the rotor installed. It came with the rotor and 6 little torx bolts that have already got the blue loctite installed. I used a t-25 screwdriver to screw these on. (if I remember correctly)


I tightened these using a 'star-method' of doing one then doing the one across from it using guesstimation. They recommend a torque wrench, which I do not have. Next I slid the skewer in. These skewers feel a little flimsy, and i had to take the springs out and untangle them from each other before i could install it. Its funny how springs, when put within an inch of each other, tend to get amazingly tangled. Next, I put the tire on the fork - and then installed the front brake caliper onto the fork. The screws, washers, and spacer-thingy are all put together for you, but not in a way that didn't prevent the whole mess from falling apart when i took it out of the bag. So - I had to fiddle with it and put it back into the right order for about 10 minutes before I could install it.


The only thing left was to install the seat/seatpost, snug up the cockpit, and install the poploc. I dont have any pictures of this process.. However, when installing the poploc - be sure to have the lever OPEN. On the fork - unscrew the tiny little allen screw, then wrap the wire in and under the screw. Hold the wire as well as you can under the screw, and tighten it down. Once this is done, you should cut the wire and stick a crimper on the end so it doesn't fray. I still need to pick up a bottle of crimpy-doos so that I can cut that cable. Also - for the grips, cover the ends of the handlebars with some dish soap to get it a bit slippery. This will make putting the grips on a snap. Otherwise, you will struggle forever. Here is the cockpit once i got it all installed:


Here is the whole bike, after I threw on the crappy pedals that came with the bike:


Check out this hilarity:


Notice something funny? I didnt either right away. MOTOBCEANE. Look again. That sort of spoils the brand new bike smell a little. What kind of idiot misspells their own brand name on their product? Thats really the only thing I am dissatisfied about. The bike, otherwise, looks great. The front wheel needs minor truing and I need to adjust the rear brake, as it is rubbing a little. I had to adjust the derailers a little while test riding, and the thing shifts really nicely. The fork works great, feels really plush or really firm depending on poploc. Of course, this is just a "rode around the neighborhood 20 minutes after setup" analysis. I get my time ATAC pedals on friday. I'll post an in-depth "review" of the bike saturday or sunday.